
Hi guys, I had a lot of people asking me about the black-card technique recently, so I decided to make a short how-to video about it using the amazing Wyadup beach as a backdrop.
It's my first ever video so please excuse the crappy sound quality :)
What is the black card technique?
Allegedly invented in Taiwan, the black card technique somewhat stems from the film days where the developer would "burn" parts of the scene in the lab to make them look darker. With the black card technique, we're actually doing this in-camera and on-location! This method only works when shooting long exposures, ideally when using a solid ND filter. It s meant to work as an alternative to the gradual ND filter.
The idea is that you hold a black piece of card in front of your lens over the brightest part of the scene (usually the sky) only removing it for a few seconds in order to expose the sky properly. Since most landscape scenes have a broad dynamic range, the sky only takes a couple of seconds to expose, whereas the foreground usually takes 3x or longer to expose properly.
What you need:

-Camera (duh!)
-Tripod
-ND filter
-Matte black card(big enough to fully cover the front element of your lens
How does it work?
Let's say you have a 10-stop ND filter attached to your lens and your foreground needs 60 seconds to expose, but the sky only 10 seconds. You now take the black card and gently shake it over the sky-part of the image for 50 seconds, being careful not to cover too much of the foreground, otherwise the foreground will end up underexposed. After these 50 seconds you take the black card away and expose let the sky expose for the remaining 10 seconds, thus resulting in an even exposure across the entire scene with no under-exposed foreground or over-exposed sky.
Keep in mind that you need to shake the card gently during exposure as to avoid a harsh line in the final image. This will take some practicing but it's worth getting right.
This technique works best on flat, straight horizons, but with a bit of practice can also be applied on curved horizons
How do I know how long to use the black card?
The easiest way to determine proper exposure times for the fore- and background is to set your camera to Aperture priority mode, turn on live-view, turn on auto-focus and move your focus point onto the brightest part of the image (the sky). Now press the shutter button half-way down and take a reading. your camera will tell you how long it needs to correctly expose for the sky. Now repeat the same process on the darkest part of the image (the foreground or POI in the foreground) to know how long the foreground needs to be exposed properly. The difference in time is how long you need to cover the sky with the back card for an even exposure.

I have been using this technique for a couple of years now and it's a great way to easily correct for a broad dynamic range so you don't have to blend images in PS.
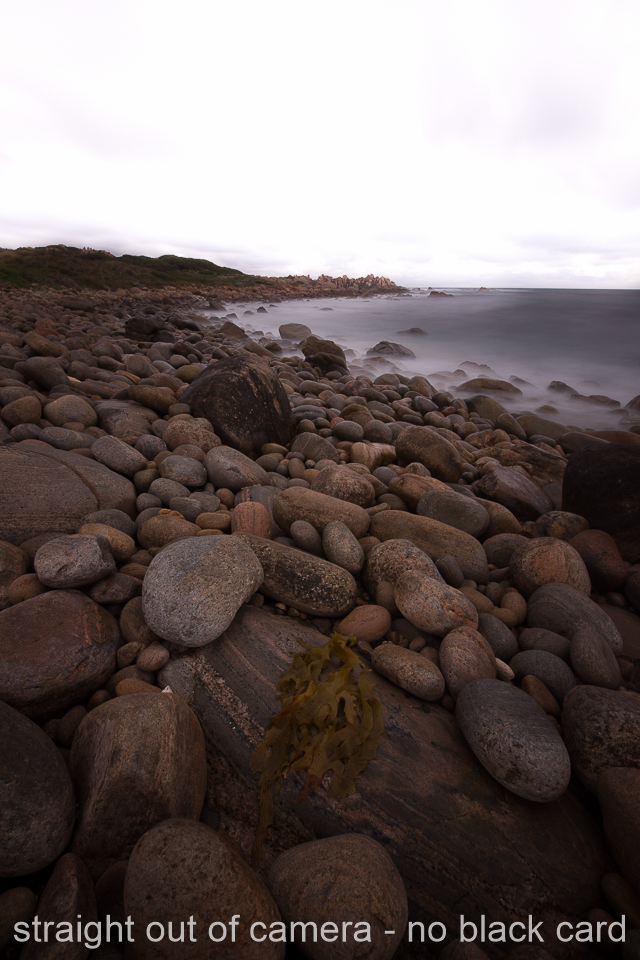
Below you find a few more sample images where I used this technique:


If you liked this article, please feel free to share it with your friends and/or leave a comment below.
Cheers :)
I guess I have selected a mind blowing and interesting blog magnumreviewworld
ReplyDelete